Posts Tagged ‘Arduino’

Yet Another Project: a PLC

Wednesday, May 27th, 2015

I’ve spent the past 2 years building machines and designing controller boards for them. These boards are all still in alpha status and I am quite sick of having to design the whole board anew whenever someone comes up with a new feature.

One could keep the whole thing extremely modular and design something around a master controller communicating with smaller boards that all have a certain purpose. But I want at least a certain functionality on one board to keep the wiring and communication programming as simple as possible. So currently I am thinking about building a stackable board that has the main processor and all the com I/Os on it that can be expanded by boards with extended features such as relays, decoupled outputs and such.

I was inspired by the [controllino]. I might as well buy one, but they seem to be in trouble with their part suppliers and I just can’t wait. Also, I want to do this by myself, learn stuff and make it available to everybody.

I did some research and stumbled over the [OpenPLC] project. I like what he did so far but I find the form factor a bit too clumsy for my purposes.

In the next weeks (and months, as these things tend to turn out) I will do some research/crowdsourcing as to different parts of the circuit and I will try to document it here. So whoever is up to such nerdy stuff: stay tuned :)
Tutorial: Using Textwrangler instead of the Arduino IDE

Wednesday, October 16th, 2013

Doing some more serious programming I became aware of some shortcomings of the Arduino IDE. What annoyed me most was the fact that it is impossible to customize all keyboard shortcuts. Using a German keyboard layout combinations such as shift+[ are almost impossible to achieve. A question on the forum led to a rather smug answer I should simply edit the source code and compile my own. I won’t. (more…)

HowTo: 14bit Midi from PD to Ableton Live

Wednesday, October 24th, 2012

Midi sucks. I never understood how people could work with 7bit when it comes to filters or mixing consoles. That’s why I started building my [mixer controller]. Now that it at least works halfway, I started experimenting with its implementation with common computer programs. Luckily, Live has the ability to handle 14bit midi messages, and its easy!

How 14bit midi works

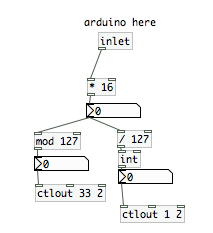
The regular MIDI control message has 7bits, giving you a number between 0 and 127. 14bit messages use two of those, using two corresponding control messages. Looking at the list of [MIDI controller numbers] you can see that numbers 32-63 are “LSB for controllers 0-31”. They provide the 7 higher bits to our value. Controller 1 gives us 2^0 to 2^6, controller 33 will add 2^7 to 2^13. A device or program that uses 14bit midi will expect both messages to be sent together.

I built a small patch in PD that takes an analog signal read by an arduino and converts it to two midi messages, sending a 14bit midi message on channel 2, using controller 1 and 33. Note that the Arduinos analog in uses only 10bit. That’s why we multiply the incoming number with 16, adding 4 bits.

converting a 10bit number into a 14bit MIDI message

The messages are sent via a virtual MIDI port. Here’s a nice tutorial how to set that up on a mac: http://www.johanlooijenga.com/tools/5-apps/12-virtual-ports.html

How to implement 14bit control messages in Ableton

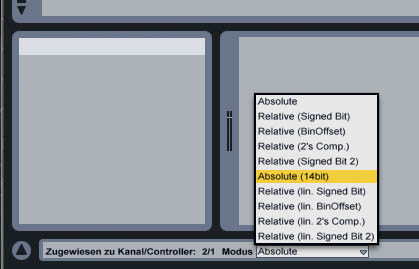
It’s very easy. Activate Abletons MIDI learn function, click on whatever you want to control and turn your knob or use whatever controller you want to implement. Ableton will recognize it. Now look on the bottom of the screen and you’ll see a drop down menu where you can choose the kind of control message Ableton should expect from that controler. Here, you choose “Absolute(14bit)”. And there you go :)

Bottom left: choose the type of message you're receiving

I hope this helps! Let me know if I made a mistake or you didn’t understand something.

Building Controllers 0.1 [updated]

Saturday, September 22nd, 2012

Being a fan of customized user interfaces, I started building me a small mixing desk controller.

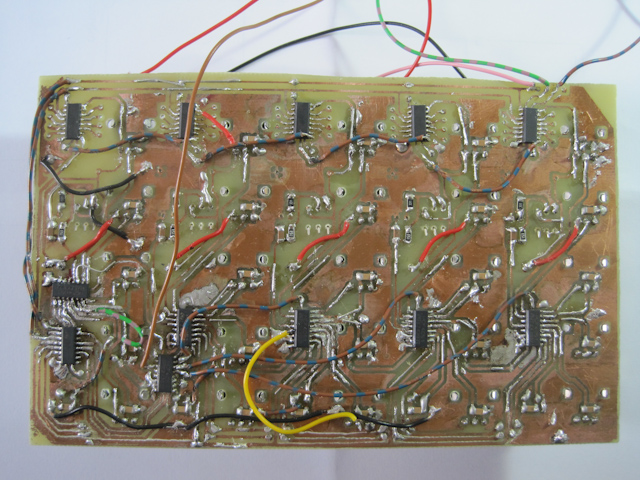
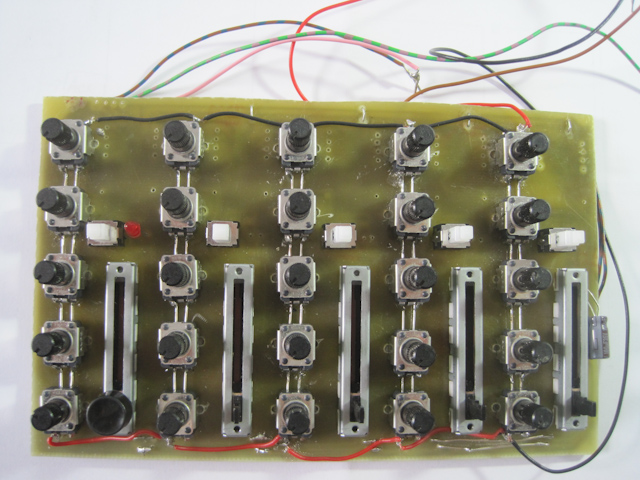
The idea is to in the end have a set channel modules that I can stick together and have a mixing desk controller of the size I need. Below you see my first test version that has 5 Channels with 5 potis and one slider and a button with led each (makes 30 potis/sliders in total). They’re connected via the obligatory Arduino, multiplexing one analog in via a combination of 4094 registers and 4051 multiplexers.

As you can see, the first board design needed a considerable amount of hacking. The main feature, a backchannel that feeds 5 vu meters with audio levels, isn’t on the board yet. But so far it works. Stay tuned…


The Dark Side. Quite a few bridges were to be made...


Front view. The pcb is a standard EU (16x10cm). Pretty compact :)

[UPDATE]

I took a back plate of one of our enclosures at work to build an enclosure for the mixer. I already managed to control PureData and Ableton with it. Next is Virtual DJ. It’s fun for sure!

Now with a little improvised front plate

Arduino Multiplexing / Pure Data Communication

Wednesday, June 13th, 2012

I’m learning a lot of Arduino stuff right now, since I started yet another project. The objective is to create controllers that output 14-Bit MIDI (also known as [NRPN]) or OSC. Reason is mainly that MIDI pisses me off thousandfold. Why the hell are we still stuck to 7 bits when it comes to controlling musical equipment?!?
So I sat down and started designing a sort of mixer controller for use with [Pure Data] that not only controls but also get a visual feedback on sound levels in the form of LED bar graphs. I did a basic layout I will post later. For now it looks like a standard mixing console with

  • 4 channels having
  • 1 Fader
  • 9 knobs (typically 1xGain, 4xEQ, 4xAux)
  • 10 Buttons (Mute, PFL, 4xGroup, 4xPre/Post)
  • 10 LEDs to show button states
  • 1 12 LED bargraph to show audio levels


That is a lot of analog in and output. Considering the amount of free pins on an Arduino, this calls for some serious multiplexing, of which I did first tests in the last days.

Pure Data audio levels on a LED bar graph

I did some first tests connecting two 10LED bar graphs to 3 4093 shift registers. I played audio files in PD, using [env~] to get the dB levels on a scale from one to ten and send them to the Arduino which then conveyed them into the registers. This was a bit tricky since a register only goes to 8 and the two leftover LEDs have to be controlled with the next one. I got it running after a while, though.

Results: I tested several intervals for [env~] and settled for 8000 samples. Everything else made the display too jumpy. The dynamic of the scale is still not satisfactory. That is something that might be solved by software, but the binary output of the 4096 also limits it a lot. While it`s really cheap this way, I might be better off using a D/A converter.

I learned quite some things about serial communication and it’s parsing with the Arduino. I might write a tutorial these days…

Multiplexing analog Inputs with the 4051

To handle the above amount of sliders and potis I’ll have to do multiply it’s analog inputs. The cheapest way I found so far is to use 4051s  (8 ins) or 4067s (16 ins). I salvaged a circuit board from a broken midi keyboard of mine that had 8 sliders and 8 knobs in combination with two 4051s, so I wrote a patch that reads these 16 controllers and reports changes to PD. That worked extremely well. I will post the Arduino program and the circuit here in a while.

Burning a new bootloader into my Arduino Duemilanove [solved]

Wednesday, April 27th, 2011

[UPDATE]

I finally made it happen!!!!

After two days of suffering I found a thorough explanation, how to burn the Arduino bootloader on an Atmega328. This is the solution.

The 'self programming' Arduino

[/UPDATE]

I wanted to start testing the freshly soldered boards for the Diskokugel when I had to discover, I had made a big mistake simply using the Atmega328 of my Arduino in my LED lamp. It turned out to be not quite as simple to replace since the Atmega needs a special bootloader to work in the Arduino board.

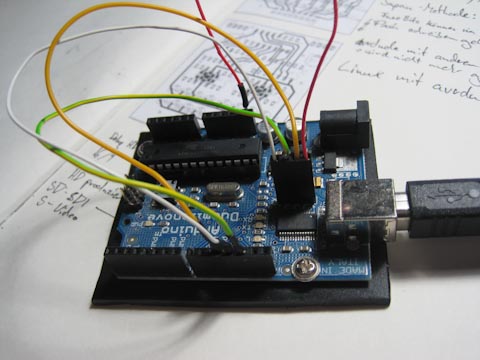
There are several ways to burn that bootloader into the chip. The easiest would be having an Arduino and programming it to do it. But since mine was without working chip, I had to look for other solutions. I found one that uses the FT232 on the board to program the Arduino itsself without an AVR writer. However, the solution programmed there is for Windows only. There apparently is a way to do it with a Mac but I wasted a whole day on trying to get it to work. It’s really tiring, installing package after package due to dependencies, having to compile it all, etc. I ended up compiling packages and, when I had finally done that, having forgot what other package I actually wanted to install in the first place.

I’ll try again tomorrow, taking the chip out of the lamp and putting it back into the Arduino. If the Arduino-as-AVRISP works, Ill simply burn me a stash of Arduinos…

A little LED-Lamp

Monday, February 28th, 2011

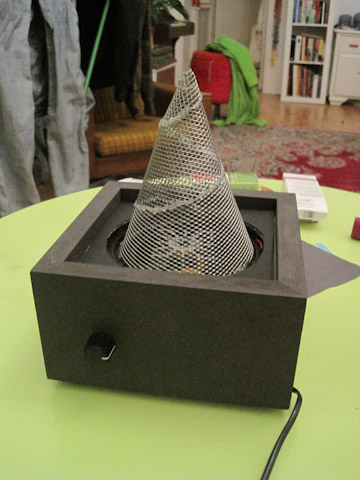
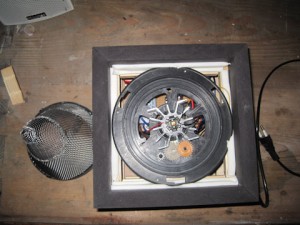
I built a lamp for my girlfriend. It’s quite simple: I took a rotating part of a lamp I broke some time ago (some stupid aquarium simulation), a spare 3 color Cree LED and chicken wire. A little cheesy but quite nice. If you lie on the ground an watch it for some time, the spiral seems to stop and the room rotates instead.


The LED lamp

the knob lets you choose the color or the speed the color changes

color LED lamp

the turning mechanism

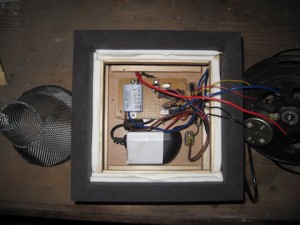
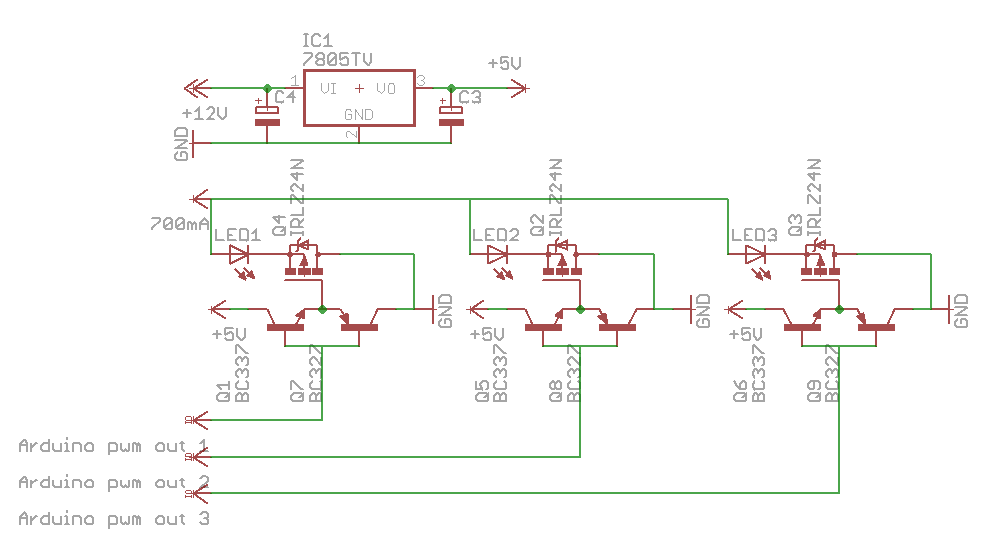
inside: a 12V power supply and a constant current supply for the led, an atmega 328 (arduino)

Of course, the Atmega32-8 is completely oversized for such a project, but it was at hand and programmable via the Arduino. I’m sure the extra constant current supply is also obsolete, but I didn’t get to try otherwise. Comments how to optimize the setup are always appreciated.
PD Video Player with Sound

Saturday, November 13th, 2010

I had the idea to build a kind of solid state video player using Linux and Puredata with an Arduino. The educated reader might ask “Why PD?” and, of course, is right. The simple answer is: Because I can and its easy.

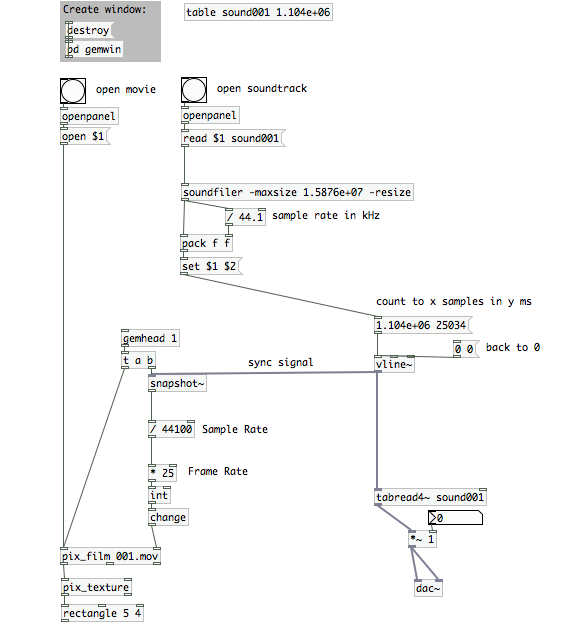
I take the latter back. When I came up with this I had totally ignored, that Puredata/Gems Pix_Film object doesn’t play sound. This means, video and sound have to be played in separate players and then be synced. Some research in PDs list gave me an example I started working with and I was partially successful. Video and sound sync well with a [vline~] but with high resolutions the sound glitches. This can be reduced by trying different video codecs (motionjpg is supposed to work pretty well) but still I wasn’t able to play 1280×1024 videos without the sound dropping sometimes. I didn’t have this problem using the [pix_buffer] object, but this way the video is loaded into the RAM uncompressed, which takes up tons of space and limits the possible length of videos loaded/used. This was on my MacBook with 2x2GHz and an onboard Intel 9400m graphics card. I will try it on Linux in the next days, lets see, if it works better.

However, I expect no wonders and theres no sense in building a solid state video player that needs hardware this expensive (and energy intensive). I want to use one of these fit-pcs, loving their small design and power consumption. For them to work with videos of that resolution I need to use their hardware acceleration, which might prove difficult on Linux (I heard nothing good about the support of intels gma500) and even worse when relying on PD/Gem, which uses OpenGL to render video. So the plan now is to use a common video player like VLC or mplayer and remote control it via network/localhost. That should take care of the hardware acceleration and still make use of the serial interface and interaction possibilities of PD. Stay tuned…

Pure Data Video Player with Audio Sync

This patch syncs video and audio


PD and Arduino

Monday, October 18th, 2010

I explored some ways to use PD to communicate with an Arduino. There are wo ways to interact with an Arduio from PD: serial communication via the [comport] object and controlling the Arduino directly with [pduino] using the firmata firmware.

[comport] simply sends and receives serial messages. I found it a little difficult to convert those messages into the right format as to understand and further process them. The PD help file isn’t exactly helpful to that extend, but I found a patch called ArduinoPDMessageSystem that makes sense of the serial messages, even though I haven’t understood every objects function there yet.

So far, I have managed to send messages to the Arduino to interface a HCF4094 shift register controlling 8 LEDs. I use the same register to control my “Diskokugel”, so heres for the next step to its completion :-)

Crazy AV Machines Workshop

Monday, October 4th, 2010

The past week I participated in a PD workshop run by Oscar Martin and Luca Carruba at NK gallery. The workshop lasted one week and ended with a collaborate performance where all participants used their patches made during the workshop. I can’t tell you how that turned out because unfortunately I had to leave two days early to finish another job. However, the workshop was quite inspiring. Oscar and Luca rushed us through the possibilities of the software so fast that I imagine it hard for an actual newbie to keep up. For me it was quite informative, especially since I had my own agenda, wanting to know how to communicate with an Arduino with PD as means of an interface.

I’ve worked with Max/MSP and VVVV before and also had a look at JMax and PD back in 2002. PD has evolved a lot since then and since it is a piece of true open source software it has all my sympathies. The community is active and I´ve found the mailing list extremely patient and useful.